 Skip to content




Staging heavy equipment and materials on your driveway is one of the most overlooked logistical challenges of a professional floor coating project. Without proper preparation, the weight of grinders, vacuums, and supply trailers can crack pavers, stain concrete, and create lasting damage that far outlives the installation itself. The key is creating a designated, protected staging zone that distributes weight, contains debris, and keeps the work flowing efficiently from the driveway into the garage.
Key Takeaways
- Use plywood or composite mats under all heavy equipment to distribute weight and prevent driveway cracking.
- Establish a clear containment zone with plastic sheeting to manage concrete dust and chemical spills.
- Coordinate equipment access paths to avoid blocking essential home entry points during the multi-day process.
- Verify your driveway’s load-bearing capacity before positioning shot blasters or large diamond grinders.
- Protect decorative surfaces like stamped concrete or pavers with breathable, non-staining underlayment.
- Plan for power cord and vacuum hose routing to minimize trip hazards and abrasion on driveway edges.
- Schedule a pre-installation walkthrough with your contractor to mark staging areas and identify potential damage risks.
Why Driveway Preparation Matters for a Successful Coating Project
The quality of your new garage floor depends as much on what happens outside the garage as inside it. According to the American Concrete Institute, surface preparation equipment like planetary grinders can weigh over 1,200 pounds, and when combined with industrial vacuums and generators, the total equipment footprint often exceeds 3,000 pounds concentrated in a small area. Placing this directly on an unprotected driveway risks immediate structural damage. A study by the National Ready Mixed Concrete Association found that point loads from heavy machinery are responsible for nearly 18% of residential driveway failures within the first five years of installation.
Beyond weight, the preparation phase generates significant debris. Diamond grinding creates fine silica dust that can stain light-colored concrete and settle into the pores of brick pavers. Chemical etching or moisture mitigation primers can drip during mixing and transfer, leaving permanent marks. As James Mercer, Senior Project Manager at SurfaceLogix, explains: “We’ve seen homeowners spend more repairing their driveway after a coating job than they did on the garage floor itself. A few sheets of plywood and a roll of 6-mil poly sheeting prevent 90% of those issues.”

Assessing Your Driveway’s Load-Bearing Capacity
Not all driveways are engineered to support concentrated heavy loads for extended periods. Standard residential concrete driveways are typically poured at 4 inches thick with a compressive strength of 3,000 to 4,000 psi. While this handles passenger vehicles easily, a stationary grinder exerting 1,500 pounds through four small casters creates a point load that can exceed the flexural strength of the slab, especially near control joints or edges. Asphalt driveways are even more vulnerable, particularly in warm weather when the binder softens and becomes susceptible to rutting under static loads.
Before the installation crew arrives, walk your driveway with the contractor and identify any existing cracks, spalling, or settlement areas. These weak points should be clearly marked and avoided entirely. If the only viable staging area sits over a known weak spot, the contractor should use crane mats or engineered composite panels that span at least 3 feet beyond the compromised area in all directions. This distributes the load across a larger surface area, reducing the pounds-per-square-inch to a level the substrate can handle.
Concrete vs. Asphalt vs. Paver Driveways: Different Protection Needs
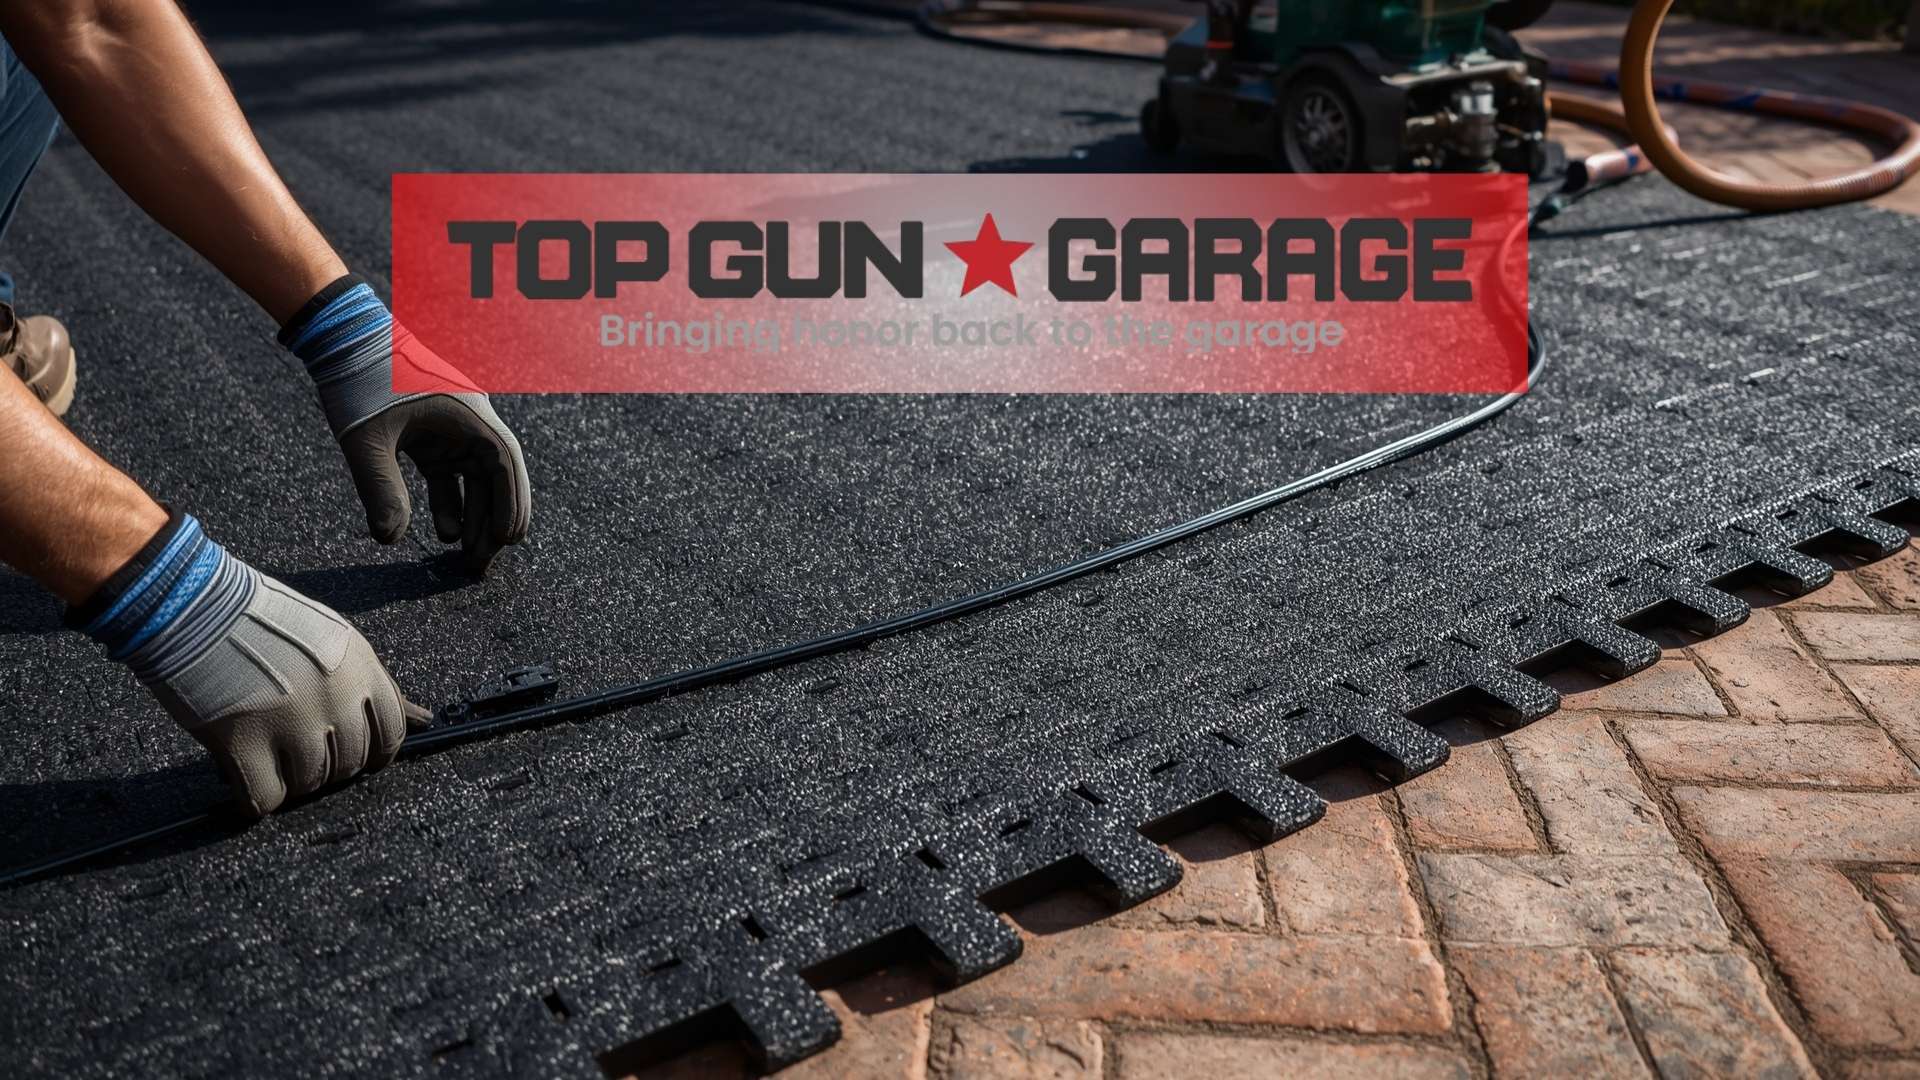
Each driveway material demands a specific protection strategy. Concrete is generally the most resilient but still susceptible to surface staining from hydraulic fluid leaks or chemical spills. A layer of ¾-inch CDX plywood topped with 6-mil polyethylene sheeting creates an impermeable barrier that also cushions the concrete from impact. Asphalt requires thicker protection—at least 1-inch plywood or oriented strand board (OSB)—because the bituminous binder can deform under pressure, especially when ambient temperatures exceed 85°F. For paver driveways, the challenge is preventing individual units from shifting or cracking. Use interlocking composite ground protection mats, similar to those used on construction sites, which distribute weight across multiple pavers simultaneously.
| Driveway Material | Recommended Protection | Key Risk | Minimum Thickness |
|---|---|---|---|
| Concrete | Plywood + poly sheeting | Surface staining, edge spalling | ¾ inch |
| Asphalt | OSB or composite mats | Rutting, softening in heat | 1 inch |
| Concrete Pavers | Interlocking composite mats | Individual unit cracking, shifting | 1.5 inches (mat height) |
| Stamped Concrete | Breathable geotextile + plywood | Texture flattening, stain penetration | ¾ inch plywood over fabric |
| Gravel | Compacted base + plywood | Rutting, equipment sinking | 1 inch over compacted stone |
Creating a Designated Equipment Staging Zone
The staging zone should be established at least 10 feet from the garage opening to allow for material movement and ventilation. Mark the perimeter with high-visibility cones or caution tape so family members and delivery personnel avoid the area. Within this zone, lay down your protective underlayment in a continuous layer, overlapping seams by at least 12 inches and taping them with duct tape to prevent shifting. The entire footprint should extend 3 feet beyond the actual equipment footprint on all sides to catch any drips or debris that migrate.
Position the largest, heaviest equipment first—typically the diamond grinder or shot blaster—closest to the garage door to minimize travel distance over unprotected surfaces. Place the industrial vacuum adjacent to it, ensuring the vacuum hose can reach the grinder’s dust shroud without stretching or kinking. According to data from the Occupational Safety and Health Administration, proper dust containment during concrete grinding reduces airborne silica levels by up to 99% when the vacuum maintains a minimum airflow of 150 cubic feet per minute at the tool. This means the vacuum must be positioned to allow a straight, unimpeded hose run.
Containing Dust and Debris Migration
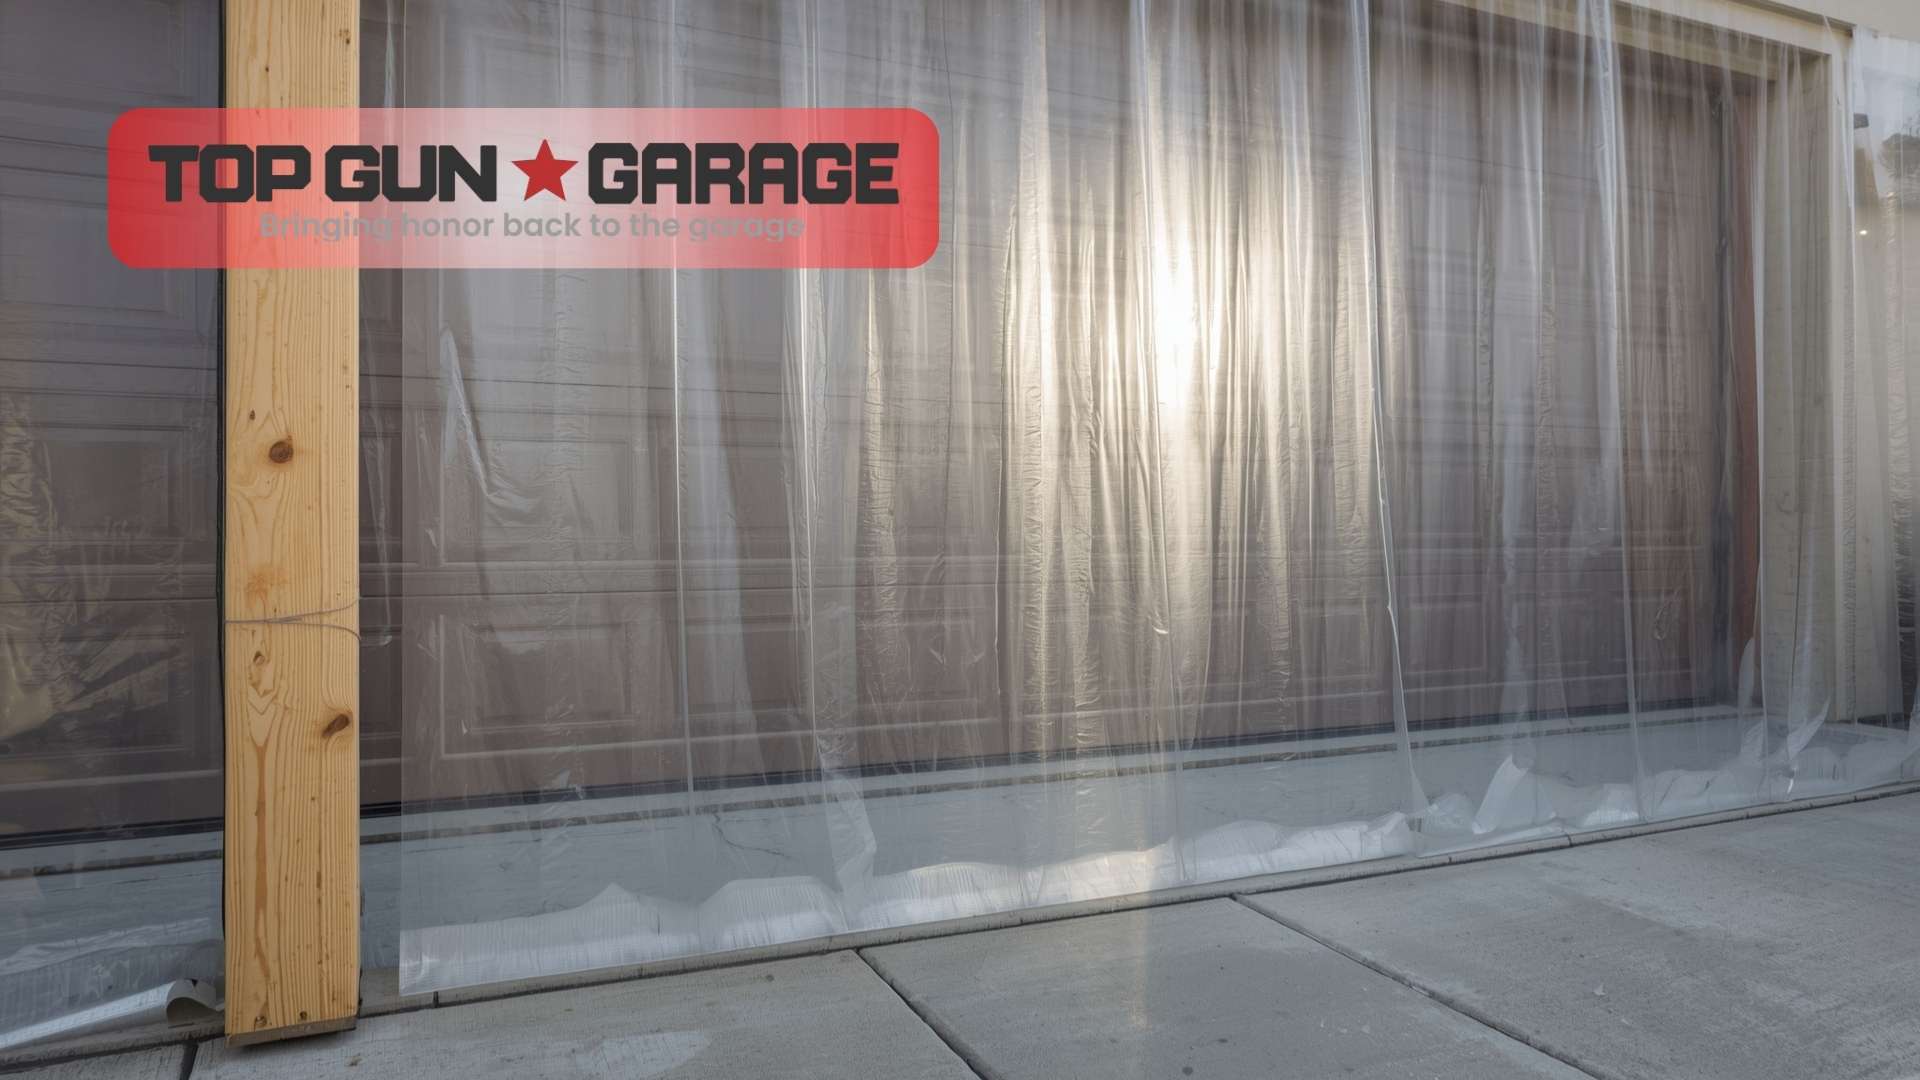
Even with high-efficiency dust extraction, some particulate will escape during tool changes, filter cleaning, and material mixing. Erect a temporary containment wall using 6-mil plastic sheeting attached to a frame of 2×4 lumber or telescoping poles along the driveway edge closest to landscaping or home entry points. This barrier should be at least 8 feet tall to intercept airborne dust. For homes in windy areas, secure the bottom edge with sandbags or water-filled barrier tubes. Research from the Environmental Protection Agency indicates that simple perimeter containment reduces off-site dust migration by approximately 85% during construction activities.
Managing Power, Water, and Access Logistics
Professional epoxy installation equipment demands significant electrical power. A large planetary grinder can draw 30 amps at 240 volts, often requiring a dedicated circuit or portable generator. If the crew uses a generator, position it on its own protected pad at the far end of the staging zone, downwind from the garage opening to prevent exhaust fumes from entering the workspace. Route all power cords along the edge of the driveway, securing them with cord covers or heavy-duty gaffers tape to prevent tripping. Never run cords across walkways or door thresholds without proper protection.
Water access is equally critical for wet grinding methods or mixing water-based epoxy primers. Connect a heavy-duty garden hose to the nearest spigot and run it along the same protected path as the power cords, keeping electrical and water lines separated by at least 12 inches. If the spigot is inside the garage, the hose must pass through the staging zone—protect it from being crushed by equipment by running it through a section of rigid PVC conduit laid flat on the ground.
Coordinating Vehicle Relocation and Daily Access
During the installation, which typically spans two to four days including preparation, coating, and curing, the garage will be completely inaccessible. All vehicles normally parked inside must be relocated to the street, a neighbor’s driveway, or an alternate parking area before the crew arrives. If your driveway serves as the primary access to the home’s front entrance, establish a secondary walkway using plywood sheets laid over grass or landscaping to prevent foot traffic from tracking debris into the house. As Maria Gonzalez, Operations Director at Precision Coatings Group, notes: “The biggest complaint we hear isn’t about the floor—it’s about family members walking through dust and tracking it onto carpets. A simple designated walkway solves this entirely.”
Protecting Landscaping and Adjacent Surfaces
The area immediately surrounding the driveway staging zone is vulnerable to collateral damage. Concrete slurry from wet grinding can kill grass and ornamental plants within hours due to its high alkalinity. Cover all landscaping within a 10-foot radius of the staging area with breathable drop cloths—never use plastic directly on plants, as it can cause heat buildup and suffocation. For delicate shrubs or flower beds, construct a temporary plywood shield angled to deflect any spray or splatter away from the foliage.
Garage door tracks, weatherstripping, and the lower door panel itself are often damaged during equipment movement. Apply painter’s tape and a layer of ram board or cardboard to the bottom 2 feet of the garage door tracks and the door’s interior face. This prevents scratches from vacuum hoses, power cords, and the grinder’s handlebars as they pass through the opening. The garage door threshold area is particularly susceptible to impact damage, so ensure it is fully protected or temporarily removed before work begins.
Step-by-Step Driveway Preparation Checklist
- Inspect and document: Photograph the entire driveway surface, noting any existing cracks, stains, or damage. Share these with your contractor before work begins.
- Clear the area: Remove all vehicles, trash bins, bicycles, and decorative items from the driveway and the approach path.
- Mark the staging zone: Use cones and caution tape to define a 15-foot by 10-foot minimum area centered on the garage door opening.
- Lay protective underlayment: Place plywood or composite mats over the entire marked area, overlapping seams and taping them securely.
- Install containment barriers: Erect plastic sheeting walls along the driveway edges adjacent to landscaping or entry doors.
- Route utilities: Run power cords and water hoses along protected paths, using cord covers at any crossing points.
- Protect the garage opening: Apply ram board to door tracks, weatherstripping, and the lower door panel.
- Establish a walkway: Create a clear, protected path from the street or side yard to the home’s main entrance.
- Verify with the crew: Walk the entire setup with the lead installer before any equipment is unloaded.
Common Mistakes That Lead to Driveway Damage
One of the most frequent errors is underestimating the duration of equipment placement. A grinder may sit in one spot for several hours during edge work or detailed profiling. Over that time, even a modest weight can cause asphalt to deform or concrete to develop micro-cracks that expand with freeze-thaw cycles. Always assume equipment will remain stationary for at least 4 hours and protect accordingly. Another common mistake is using plastic sheeting directly under heavy equipment without a rigid layer. The plastic can tear, ball up under casters, and actually increase point loading by concentrating weight on small areas.
Homeowners also frequently overlook the impact of chemical spills. Epoxy primers, moisture vapor barriers, and urethane topcoats contain solvents and resins that can permanently etch or discolor concrete and asphalt. A single drip of polyurethane topcoat can leave a glossy, amber stain that cannot be removed. The protection layer must be impermeable and continuous—no gaps, no thin spots. As Dr. Alan Chen, Materials Engineer at the National Institute of Standards and Technology, states: “The chemical resistance of common driveway materials to epoxy components is surprisingly poor. Concrete is porous and absorbs liquids rapidly, while asphalt binders can be dissolved by certain solvents used in coating formulations.”
Weather Considerations for Outdoor Equipment Staging
In regions with intense sun, such as the southeastern United States, asphalt driveways can reach surface temperatures exceeding 140°F in summer. Under these conditions, even properly protected asphalt may soften enough to allow equipment to sink slightly. Schedule the heaviest grinding work for early morning hours when temperatures are lower, and consider using reflective white tarps over the staging area to reduce heat absorption. For concrete driveways, rapid temperature changes can cause thermal shock if cold water from wet grinding contacts a hot surface—maintain a consistent, moderate water temperature by running the hose for several minutes before use to flush out sun-heated water.
Rain presents a different set of challenges. Wet plywood becomes significantly heavier and can delaminate, losing its load-distributing capability. If rain is forecast, cover the entire staging zone with a waterproof tarp, ensuring it extends well beyond the equipment footprint and is securely anchored. Water pooling on the protection layer can seep through seams and saturate the driveway surface beneath, so maintain a slight slope in the tarp to encourage runoff away from the garage.
Post-Installation Driveway Restoration
Once the garage floor coating has cured and the equipment is removed, the driveway will need careful inspection and cleaning. Remove all protective materials slowly, watching for any stains or damage that may have occurred despite precautions. Sweep the entire driveway surface with a soft-bristle broom to remove dust and debris, then rinse thoroughly with a garden hose, directing water away from the garage to prevent moisture intrusion under the fresh coating. For any stubborn stains from epoxy or chemicals, consult with your contractor immediately—many can be addressed with specialized poultices or cleaning agents if treated promptly.
Inspect the driveway for any new cracks, chips, or depressions that may have developed. Compare the post-installation condition to your pre-installation photos. If damage is found, document it thoroughly and discuss remediation with your contractor. Reputable installers carry liability insurance that covers property damage, and they should address any issues without hesitation. This final step ensures that your investment in a beautiful new garage floor doesn’t come at the expense of your home’s exterior surfaces. For more insights on protecting your garage during coating projects, explore our guide on how concrete is prepared for epoxy.
FAQ
Can I leave my car in the driveway during the installation?
No. The driveway must be completely clear of all vehicles before the crew arrives and throughout the entire project duration, which typically spans two to four days. Vehicles parked nearby risk damage from airborne dust, chemical overspray, and accidental equipment contact.
What type of plywood is best for protecting my driveway?
¾-inch CDX plywood is the standard recommendation for concrete driveways. It offers sufficient rigidity to distribute point loads while being cost-effective. For asphalt or paver driveways, upgrade to 1-inch OSB or specialized composite ground protection mats for superior load distribution.
Will the equipment damage my sprinkler system near the driveway?
Sprinkler heads within 10 feet of the staging zone are at risk. Mark all sprinkler head locations with flags before the crew arrives, and consider temporarily disabling the zone to prevent accidental activation during the project. The contractor should avoid placing equipment directly over marked heads.
How do I protect my garage door from damage during the process?
Apply ram board or heavy cardboard to the lower interior face of the garage door and both door tracks. Use painter’s tape to secure it—never use duct tape on painted surfaces. The door should remain open during working hours and closed only when the crew has left for the day.
Is it safe to walk on the protected driveway during the installation?
Foot traffic should be minimized, but a designated walkway can be created using plywood sheets laid end-to-end. Never walk on unprotected areas of the driveway during active grinding or coating work, as surfaces may be slippery or contaminated.
What happens if it rains during the equipment staging period?
The crew should cover all equipment and the staging area with waterproof tarps. Wet plywood loses structural integrity and should be replaced if it becomes saturated. The installation schedule may be adjusted to account for weather delays.
Can the staging zone be located on the street instead of the driveway?
In some municipalities, placing equipment on a public street requires a permit. Check local regulations before considering this option. Additionally, longer hose and cord runs from the street to the garage can reduce vacuum efficiency and create trip hazards.
Conclusion
Preparing your driveway for the equipment demands of an epoxy garage floor installation is a critical step that protects your property and ensures the project proceeds smoothly. By assessing your driveway’s material and condition, creating a properly protected staging zone, managing utilities and access, and planning for weather conditions, you eliminate the most common sources of collateral damage. The small investment in plywood, plastic sheeting, and careful planning pays for itself many times over by preventing costly driveway repairs. For professional guidance tailored to your specific property, contact our team today to schedule a consultation and ensure your entire project—from driveway to garage floor—is handled with expert care.
References
- American Concrete Institute (ACI) — Equipment weight specifications and concrete load-bearing standards.
- National Ready Mixed Concrete Association (NRMCA) — Data on residential driveway failure causes and point load impacts.
- Occupational Safety and Health Administration (OSHA) — Silica dust containment standards and vacuum airflow requirements for concrete grinding.
- Environmental Protection Agency (EPA) — Research on perimeter containment effectiveness for construction dust migration.
- National Institute of Standards and Technology (NIST) — Materials engineering data on chemical resistance of concrete and asphalt to epoxy components.
- Why Professional Epoxy Floor Coating Matters — Additional context on professional installation benefits.
- Epoxy vs. Polyaspartic Performance Differences — Comparative data on coating material properties.
- Garage Floor Solutions for High Traffic — Information on durable flooring for demanding environments.