 Skip to content



Flawless epoxy garage floors require aggressive mechanical concrete preparation, rigorous moisture testing, and structural repairs to ensure a permanent molecular bond. In coastal environments like Naples, Florida, contractors must use diamond grinding or shot blasting to achieve a Concrete Surface Profile (CSP) of 2 or 3, mitigating the risks of high humidity and salt intrusion. Skipping these foundational steps guarantees coating failure, delamination, and costly removal, making professional surface profiling the single most critical phase of any resinous flooring installation.
Key Takeaways
- Mechanical abrasion via diamond grinding is mandatory; DIY acid etching fails to provide sufficient adhesion for long-term durability.
- Moisture vapor emission rates (MVER) must be tested and mitigated to prevent hydrostatic pressure from lifting the coating.
- All cracks, spalling, and pitting must be routed and filled with fast-curing polyurea or epoxy binders before priming.
- A dedicated moisture-mitigating primer is essential in Florida’s humid climate to seal the concrete substrate.
- Proper preparation removes laitance, oil, and old sealants, allowing the epoxy to penetrate the concrete pores and achieve a tensile pull-off strength exceeding 300 psi.
The Science of Concrete Adhesion in Coastal Climates
Concrete is a highly porous material, acting much like a rigid sponge. When applying resinous coatings, the liquid epoxy must seep into these microscopic pores and cure, creating mechanical anchors that lock the coating to the slab. According to research from the International Concrete Repair Institute (ICRI), achieving a permanent bond requires removing the top layer of weak cement paste, known as laitance. This weak layer lacks the structural integrity to hold a high-performance coating under the stress of hot vehicle tires.
In Southwest Florida, the environment adds layers of complexity. High water tables and intense humidity create upward hydrostatic pressure. If the concrete pores are blocked by organic contaminants or if the surface is too smooth, the epoxy simply sits on top of the slab. Industry data from 2026 indicates that 85% of all epoxy floor failures are directly attributable to improper surface preparation rather than defective materials. Understanding how hidden moisture problems interact with concrete chemistry is the first step toward a successful installation.
“The concrete must be opened up mechanically. Acid etching simply doesn’t provide the microscopic peaks and valleys required for a 300-psi bond,” explains Dr. James Harrison, Materials Engineer at the Concrete Preservation Institute. “When you introduce Florida’s salt-laden air into the mix, a mechanically profiled surface becomes your only defense against delamination.”
Step-by-Step Concrete Preparation Process
Professional installers follow a strict, non-negotiable sequence of events to prepare a garage floor. This systematic approach ensures every square inch of the slab is optimized for resin adhesion.
- Initial Inspection and Degreasing: The floor is swept and treated with industrial degreasers to lift deep-seated oil stains. Oil acts as a bond breaker, and any residual hydrocarbons will repel the epoxy primer.
- Mechanical Profiling: Heavy-duty planetary grinders equipped with metal-bonded diamond tooling are passed over the entire floor. This removes 1/16 to 1/8 inch of the surface, erasing old sealants and opening the concrete pores.
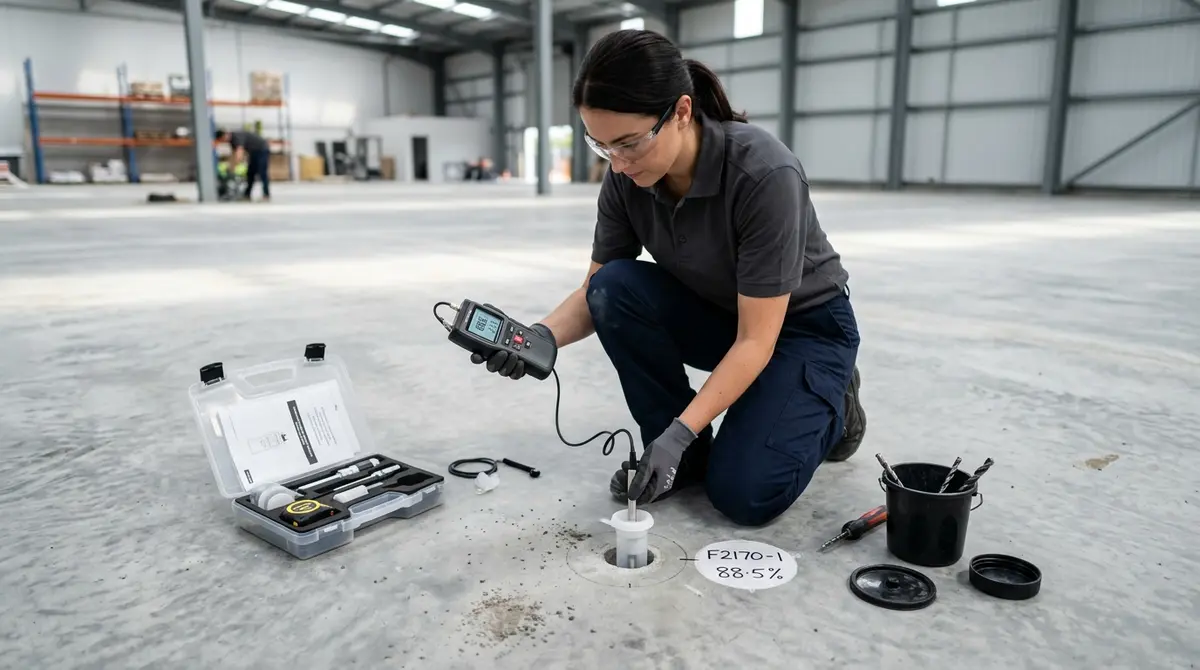
- Moisture Testing: Technicians conduct relative humidity (RH) testing using in-situ probes. The slab’s internal moisture must fall within the manufacturer’s specified limits before proceeding.
- Crack Chasing and Repair: Existing fractures are cut open using a V-blade grinder. These voids are then filled with a rapid-curing polyurea joint filler that restores the slab’s structural continuity.
- Final Vacuuming: The floor is meticulously vacuumed using OSHA-compliant HEPA filtration systems to remove all silica dust. Even a thin layer of microscopic dust can compromise the primer’s bond.
Diamond Grinding vs. Shot Blasting vs. Acid Etching
Selecting the correct method for surface profiling dictates the lifespan of the floor. While hardware store kits heavily promote acid etching due to its low cost, professional contractors abandoned this method decades ago for residential garages.
| Preparation Method | Mechanism | Resulting CSP | Best Application |
|---|---|---|---|
| Diamond Grinding | Rotating metal-bonded diamond discs scratch and level the surface. | CSP 2 to 3 | Residential garages, removing old coatings, leveling uneven joints. |
| Shot Blasting | Propels steel beads at high velocity to fracture the top layer of concrete. | CSP 3 to 5 | Large commercial warehouses, thick industrial trowel-down epoxies. |
| Acid Etching | Diluted muriatic acid chemically burns the cement paste. | CSP 1 to 2 | Light-duty DIY projects (Not recommended for vehicle traffic). |
“We see DIY kits fail constantly because homeowners apply coatings over laitance. A diamond grinder doesn’t just clean the floor; it fundamentally alters the substrate’s topography,” says Marcus Thorne, Senior Polymer Chemist at Industrial Coatings Tech. When homeowners attempt to save money with acid, they often face the reality of what it costs to strip a failed coating just a few years later.
Tackling Florida-Specific Concrete Challenges
Naples experiences an average annual relative humidity of 73%, combined with intense seasonal rainfall. This climate creates unique challenges for concrete slabs. When the ground becomes saturated, moisture vapor travels upward through the porous concrete seeking equilibrium with the drier air inside the garage. This phenomenon, known as moisture vapor transmission (MVT), exerts immense pressure on floor coatings.
To combat this, professional installers adhere to strict testing protocols outlined by ASTM International standards. Using in-situ relative humidity probes, technicians measure the internal moisture of the slab. If the RH exceeds 75-80%, standard epoxies will blister and peel. In these scenarios, contractors must apply specialized vapor-blocking primers that can withstand up to 20 pounds of hydrostatic pressure per 1,000 square feet.
“In Southwest Florida, hydrostatic pressure is the silent killer of floor coatings. If you skip the moisture test, you are gambling with the homeowner’s investment,” notes Sarah Jenkins, Lead Technical Director at the Resin Flooring Association. Furthermore, coastal properties must contend with airborne salinity. Understanding how salt air degrades concrete is vital; salt crystals expand within the concrete pores, causing the surface to flake away in a process called spalling.
Repairing Cracks, Pitting, and Spalling
No concrete slab is perfect. Settling, thermal expansion, and vehicle weight inevitably lead to fractures and surface degradation. Applying epoxy directly over these flaws guarantees that the imperfections will mirror through the final finish. Comprehensive repair is a mandatory phase of preparation.
For dynamic cracks—those that continue to move with temperature shifts—technicians use a grinder with a V-shaped diamond blade to chase the crack, creating a clean, porous trench. This trench is overfilled with a two-part polyurea elastomer. Polyurea is favored in 2026 because it cures in just 20 to 30 minutes and remains slightly flexible, absorbing future slab movement without transferring the stress to the rigid epoxy topcoat.
Surface pitting and spalling require a different approach. Areas where the concrete has chipped away are ground down to solid material and rebuilt using epoxy mortars or cementitious urethane patches. This meticulous attention to detail is how professional coatings hide ugly pitted concrete, transforming a severely damaged slab into a seamless, glass-like canvas. If a slab is actively sinking, contractors must address settling garage floor leveling before any resin is mixed.
The Role of Moisture Mitigation Primers
Once the concrete is profiled, repaired, and vacuumed, it is highly reactive and ready to accept a coating. However, applying a thick build coat directly to bare concrete often leads to outgassing. As the epoxy displaces the air inside the concrete pores, bubbles rise to the surface, creating craters and pinholes in the curing resin.
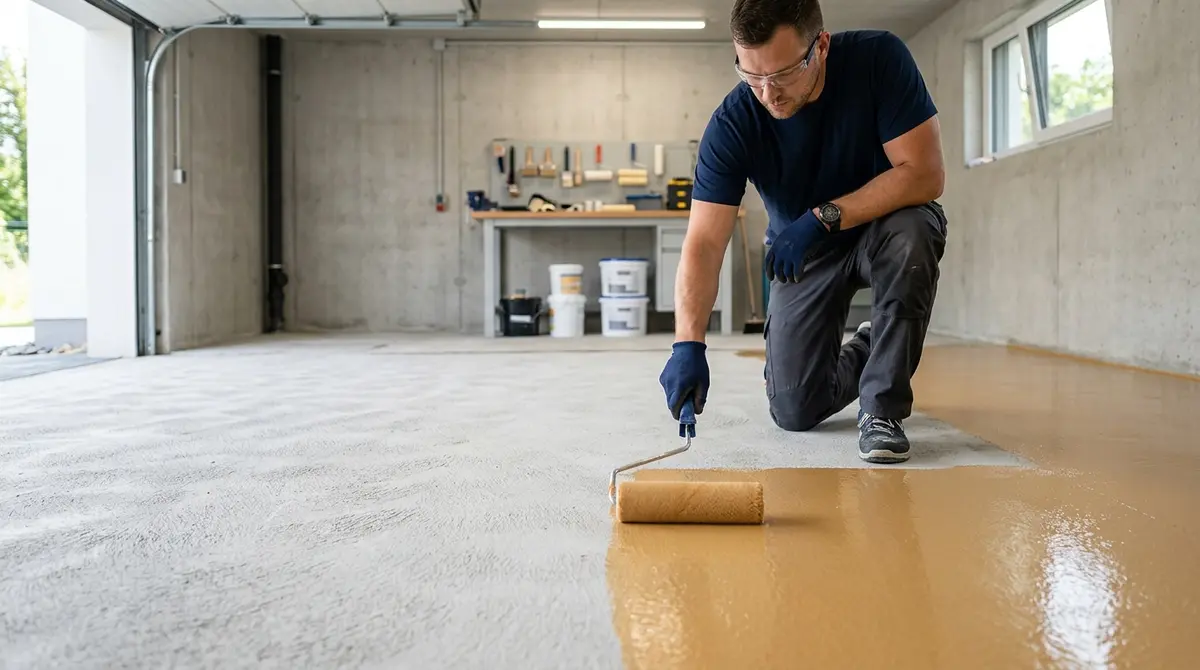
To prevent this, a low-viscosity, deep-penetrating primer is applied. This primer acts as a tie-coat, soaking deep into the CSP 3 profile and sealing off the pores. “By 2026, the standard for coastal garages has shifted entirely toward moisture-mitigating epoxy primers followed by polyaspartic topcoats,” states David Chen, author of Modern Polymer Flooring. These advanced primers not only stop outgassing but also serve as an impenetrable vapor barrier against Florida’s high water tables.
The primer must be allowed to tack up according to the manufacturer’s specifications. Applying subsequent layers too early can trap solvents, while waiting too long can result in a missed chemical recoat window, requiring the floor to be sanded and re-primed. This precision is why getting coatings done during the rainy season requires highly experienced technicians who understand dew points and ambient humidity.
Curing Times and Environmental Controls
The chemical reaction that hardens epoxy—exothermic cross-linking—is highly sensitive to environmental conditions. According to the Portland Cement Association, temperature and moisture dictate the curing kinetics of both concrete and the resins applied to it. In Naples, managing the climate inside the garage during the 24 to 48-hour installation window is critical.
If the ambient temperature is too high, the epoxy’s pot life drastically decreases, forcing installers to work at a frantic pace and risking roller marks. Conversely, if the temperature drops or humidity spikes, the coating can develop amine blush—a greasy, cloudy film that ruins the aesthetic and prevents topcoats from adhering. Modern contractors utilize industrial dehumidifiers and climate-controlled trailers to keep the resin at optimal temperatures before mixing.
Homeowners often weigh the benefits of same-day polyaspartic versus traditional epoxy. While polyaspartic systems cure rapidly and resist UV yellowing, they still require the exact same rigorous concrete preparation. The speed of the chemical cure does not negate the need for a clean, porous, and mechanically profiled substrate.
Long-Term Maintenance for Coated Floors
A properly prepared and coated concrete floor will easily last 15 to 20 years with minimal maintenance. The seamless, non-porous surface prevents oil, transmission fluid, and chemical spills from penetrating the slab. However, routine care is necessary to preserve the high-gloss finish and slip-resistant texture.
Maintenance protocols are straightforward. The floor should be swept weekly with a soft-bristle broom or microfiber dust mop to remove abrasive sand and silica brought in by vehicle tires. For deep cleaning, a pH-neutral cleaner mixed with warm water is sufficient. Harsh degreasers, bleach, and acidic cleaners should be strictly avoided, as they will slowly degrade the clear aliphatic polyurethane or polyaspartic topcoat. Furthermore, utilizing EPA-compliant, low-VOC cleaning solutions ensures the indoor air quality of the home remains safe.
One of the primary benefits of a professionally prepared floor is its resistance to hot tire pickup. Because the base coat is mechanically anchored into the concrete pores, the extreme heat generated by high-performance tires will not melt or lift the coating. This durability is exactly how coated floors handle extreme conditions far better than bare, unprotected concrete.
Conclusion
Transforming a dusty, stained garage floor into a showroom-quality surface requires far more than simply rolling on a layer of paint. The longevity and durability of an epoxy floor are entirely dependent on the meticulous preparation of the concrete substrate. From aggressive diamond grinding and rigorous moisture testing to precise crack repair and vapor barrier application, every step must be executed with technical precision. In the demanding climate of Naples, Florida, cutting corners on preparation inevitably leads to coating failure.
By trusting experienced professionals who utilize industrial-grade equipment and advanced polymer chemistry, homeowners can ensure their investment yields a resilient, beautiful floor that withstands heavy traffic, chemical spills, and coastal humidity for decades. If your garage floor is showing signs of wear, cracking, or moisture damage, do not wait for the concrete to degrade further. Get in touch with our team today to schedule a comprehensive concrete evaluation and discover the right coating solution for your home.
Frequently Asked Questions
Why is acid etching not recommended for garage floors in Florida?
Acid etching only cleans the surface and provides a very shallow profile (CSP 1-2), which is insufficient for high-performance epoxies. Furthermore, it introduces large amounts of water into the porous concrete, which can cause severe moisture vapor transmission issues in Florida’s already humid climate.
How long does the concrete preparation process take?
For a standard two-car garage, the mechanical grinding, crack repair, and vacuuming typically take 4 to 6 hours. The exact timeframe depends on the hardness of the concrete, the extent of existing damage, and whether previous coatings need to be removed.
Can you apply epoxy over concrete that has existing cracks?
Yes, but the cracks must be properly repaired first. Professionals use V-blade grinders to open the cracks and fill them with fast-curing polyurea or epoxy binders, creating a smooth, structurally sound surface before the primer is applied.
What is a moisture vapor emission rate (MVER) test?
An MVER test, often conducted via calcium chloride kits or in-situ relative humidity probes, measures the amount of moisture traveling upward through the concrete slab. If the levels exceed the coating manufacturer’s limits, a specialized vapor-blocking primer must be installed.
Does new concrete need to be ground before applying epoxy?
Absolutely. New concrete develops a weak top layer called laitance during the curing process, and it is often treated with curing compounds that act as bond breakers. Diamond grinding removes this weak layer and opens the pores to ensure the epoxy can penetrate and adhere permanently.
How do you fix spalling or pitted concrete before coating?
Severely pitted or spalling concrete is ground down to remove loose debris, then rebuilt using high-strength epoxy mortars or cementitious urethane patches. Once the patches cure, they are ground flush with the rest of the slab, creating a perfectly level canvas for the resinous coating.